
 AtomationDocsOIN SAML guide
Configure Atomation SAML SSO in Okta
Set up SAML 2.0 single sign-on from Okta to an Atomation workspace. SCIM provisioning is configured separately, and users must be provisioned before first SAML sign-in.
Scope
Atomation supports Okta SAML 2.0 SSO for workspace sign-in. This guide covers the SAML configuration only. Configure SCIM provisioning with the separate Atomation SCIM provisioning guide.
Current OIN submission scope: SAML SSO and SCIM provisioning only. Atomation does not support SAML Just-In-Time provisioning for this submission, and Universal Logout is not part of this submission.
Prerequisites
- An Atomation workspace with a known tenant subdomain, such as
subdomain. - An Okta administrator who can create and configure a SAML 2.0 app integration.
- Access to the Atomation workspace SAML settings page, where the workspace-specific ACS, entity ID, and metadata values are shown.
- SCIM provisioning configured separately before assigning users for first sign-in.
SAML and SCIM apply to one selected Okta identity org per Atomation workspace. Additional Okta orgs connect to Atomation separately for read-only assessment access only.
SAML values
Replace subdomain with the Atomation tenant subdomain provided for your workspace.
| Okta SAML field | Value |
|---|---|
| Single Sign-On URL | https://subdomain.atomation.io/auth/saml/acs |
| Recipient URL / Destination URL | https://subdomain.atomation.io/auth/saml/acs |
| Audience URI / SP Entity ID | https://subdomain.atomation.io/saml/metadata |
| SP-Initiated Login URL | https://subdomain.atomation.io/auth/saml/login |
| Name ID format | Unspecified |
| Application username | Okta username |
| Attribute statements | No custom SAML attributes required |
| Group attribute statements | Leave empty; role mapping is handled through SCIM groups |
Setup steps
Create the SAML app
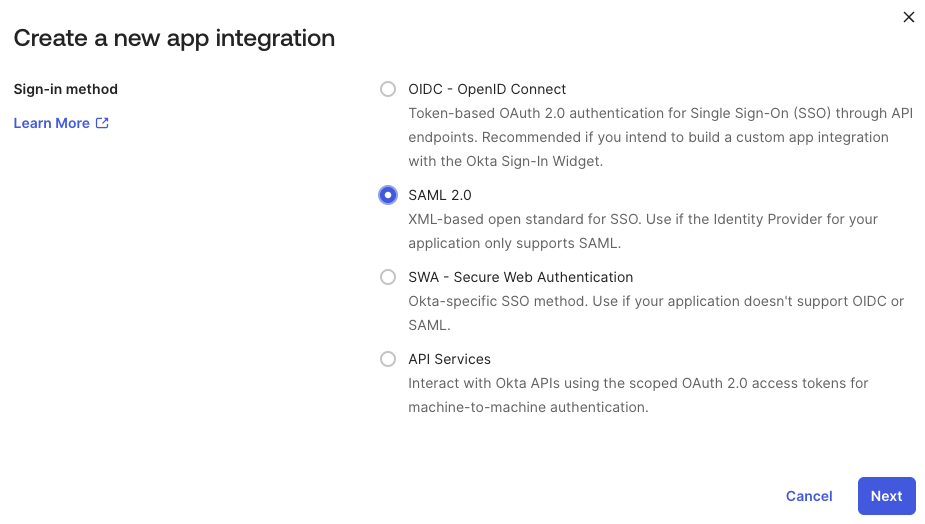
In Okta Admin Console, open Applications → Applications, select Create App Integration, choose SAML 2.0, and name the app Atomation or Atomation - subdomain.
Enter the Atomation service-provider values
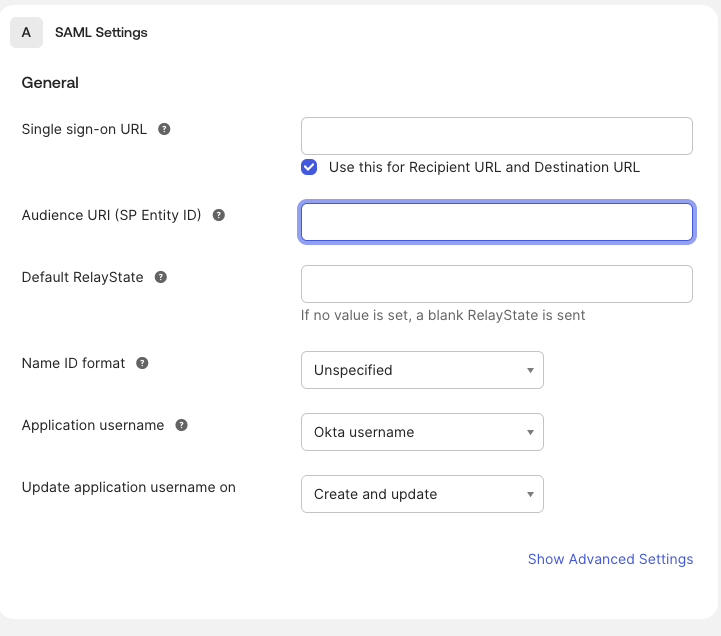
Paste the ACS URL into Single Sign-On URL. Keep Use this for Recipient URL and Destination URL checked when Okta shows that option. Paste the Atomation metadata/entity ID URL into Audience URI (SP Entity ID).
Set username and attributes
Set Name ID format to Unspecified and Application username to Okta username. Do not add SAML group attributes; assign Atomation roles with SCIM Group Push or Group Linking.
Copy Okta metadata into Atomation
Finish the Okta app, open its Sign On tab, and copy the Okta Metadata URL. Paste that metadata URL into the Atomation SAML settings for the same workspace identity org, then save and verify.
Assign users after SCIM is ready
Configure SCIM first, then assign users or app-access groups to the SAML app. Atomation does not create users from SAML assertions for this submission.

Test sign-in
- For IdP-initiated sign-in, launch Atomation from the Okta End-User Dashboard app tile.
- For SP-initiated sign-in, open https://subdomain.atomation.io/auth/saml/login.
- For OIN testing, set "Supports Just-In-Time provisioning?" to No.
- If the Okta OIN Submission Tester is used, run only the IdP and SP SAML flows.
Troubleshooting
- If sign-in reaches Atomation but access is denied, confirm the user was provisioned by SCIM before sign-in.
- If SP-initiated sign-in fails before Okta login, confirm the tenant subdomain and SP-init URL are exact.
- If the SAML response is rejected, refresh the Okta metadata URL in Atomation and verify the same Okta org is the selected workspace identity org.
- Email [email protected] with the tenant subdomain, Okta app label, timestamp, and failed step.