Okta SSO & SCIM Setup (Optional)
Let your team sign in to Atomation through Okta with SAML 2.0 SSO and provision or deprovision users automatically with SCIM 2.0. Optional — assessments don't need it, and workspace sign-in works with email + MFA out of the box.
Is this required? No — optional
You do not need SSO or SCIM to run assessments. Workspace sign-in works with email + MFA out of the box, and the assessment itself uses a separate read-only API Service App — that connection is the only one required. Set up SSO and SCIM only if you want your team to sign in to Atomation through Okta and have users provisioned and deprovisioned automatically.
One org per workspace — the first org is your primary org. SSO and SCIM apply to exactly one Okta org per workspace. The first org you configure for SSO and SCIM becomes the workspace's primary (identity) org — the org your team signs in from and where user lifecycle events originate. Every other connected org stays assessment-only. Multi-org SSO is a planned enhancement — contact [email protected] if you need it.
New to Atomation? Start with the connect your Okta org guide — first account, read-only connection, compliance standards, and first scan.
Before You Start
Atomation creates your workspace and first administrator during onboarding. Your IAM team completes the SAML setup below, then continues to SCIM if automatic user lifecycle or role group synchronization is needed.
SSO and SCIM apply to one Okta org per workspace — the first org you configure becomes the primary org. The primary (identity) org is the org your team signs in from and where user lifecycle events originate. This is separate from the read-only Okta API Service apps used for assessment data — every connected org keeps its own read-only connection, covered in the Okta API access guide.
An Okta admin who can create app integrations, configure SAML, enable provisioning, and assign users.
Create a SAML 2.0 app integration in Okta using the values shown in Atomation.
After SAML works, configure SCIM and link Okta groups to Atomation role-groups.
SSO and SCIM are configured for one Okta org per workspace. Additional orgs connect via API Service apps for data access only.
1. SAML SSO Setup
Create a SAML 2.0 app integration in Okta and enter the Atomation service provider values from Administration → SSO / SAML in your workspace.
| Okta SAML Settings Field | Paste This Atomation Value | Notes |
|---|---|---|
| Single Sign-On URL | https://subdomain.atomation.io/auth/saml/acs | Use the Assertion Consumer Service URL from Atomation. |
| Use this for Recipient URL and Destination URL | Checked | Leave this checked unless Atomation support tells you otherwise. |
| Recipient URL | https://subdomain.atomation.io/auth/saml/acs | Only appears if the checkbox above is unchecked. |
| Destination URL | https://subdomain.atomation.io/auth/saml/acs | Only appears if the checkbox above is unchecked. |
| Audience URI / SP Entity ID | https://subdomain.atomation.io/saml/metadata | Use the SP Entity ID / Metadata URL from Atomation. |
| SP-Initiated Login URL | https://subdomain.atomation.io/auth/saml/login | Open advanced settings if Okta does not show this field. |
| Default RelayState | Leave blank | Atomation does not require a default RelayState for normal setup. |
| Name ID format | Unspecified | Match the Okta SAML settings dropdown. |
| Application username | Okta username | Use the user identifier that matches the Atomation account email. |
| Update application username on | Create and update | Keep usernames updated when Okta profile values change. |
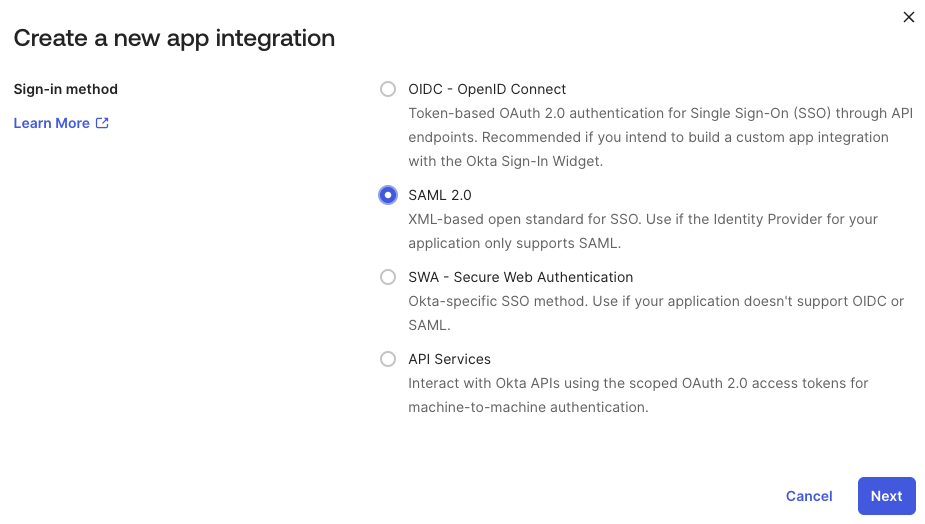
Create A SAML 2.0 App Integration
In the Okta Admin Console, go to Applications → Applications, click Create App Integration, choose SAML 2.0, then click Next.
Name The App
Use a clear name such as Atomation - subdomain or Atomation - Production, upload the Atomation logo if desired, then continue to SAML settings.
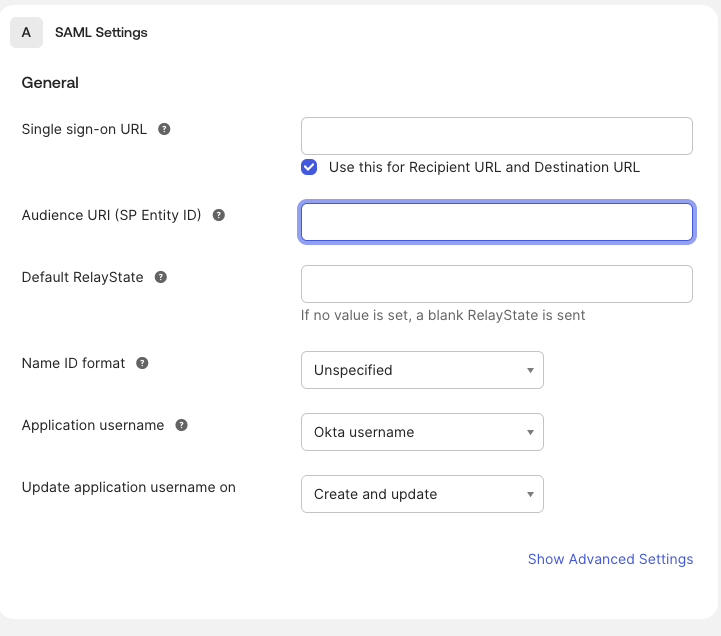
Enter The SAML Values From Atomation
In Atomation, open Administration → SSO / SAML and use the SAML Setup card. Copy the ACS URL, SP Entity ID / Metadata URL, and Login URL exactly as shown for your workspace.
In Okta, paste the Assertion Consumer Service URL into Single Sign-On URL. Leave Use this for Recipient URL and Destination URL checked. Paste the SP Entity ID / Metadata URL into Audience URI (SP Entity ID).
Set Name ID And Basic Attributes
Set the Name ID format to Unspecified and the application username to Okta username. If you use JIT provisioning, include basic user attributes such as first name, last name, and email. Role membership should be handled through SCIM Group Push or Group Linking, not a SAML group attribute.
Finish The Okta App
On Okta's final feedback screen, select This is an internal app that we have created, then click Finish.
Copy Metadata Back Into Atomation
Open the app's Sign On tab and copy the Okta Metadata URL. Paste that URL back into Atomation under Administration → SSO / SAML, then save and verify.

2. SCIM Provisioning (Automatic User Lifecycle)
After SAML metadata is saved and verified, configure SCIM if you want Okta to create, update, deactivate, and group-link Atomation users automatically.
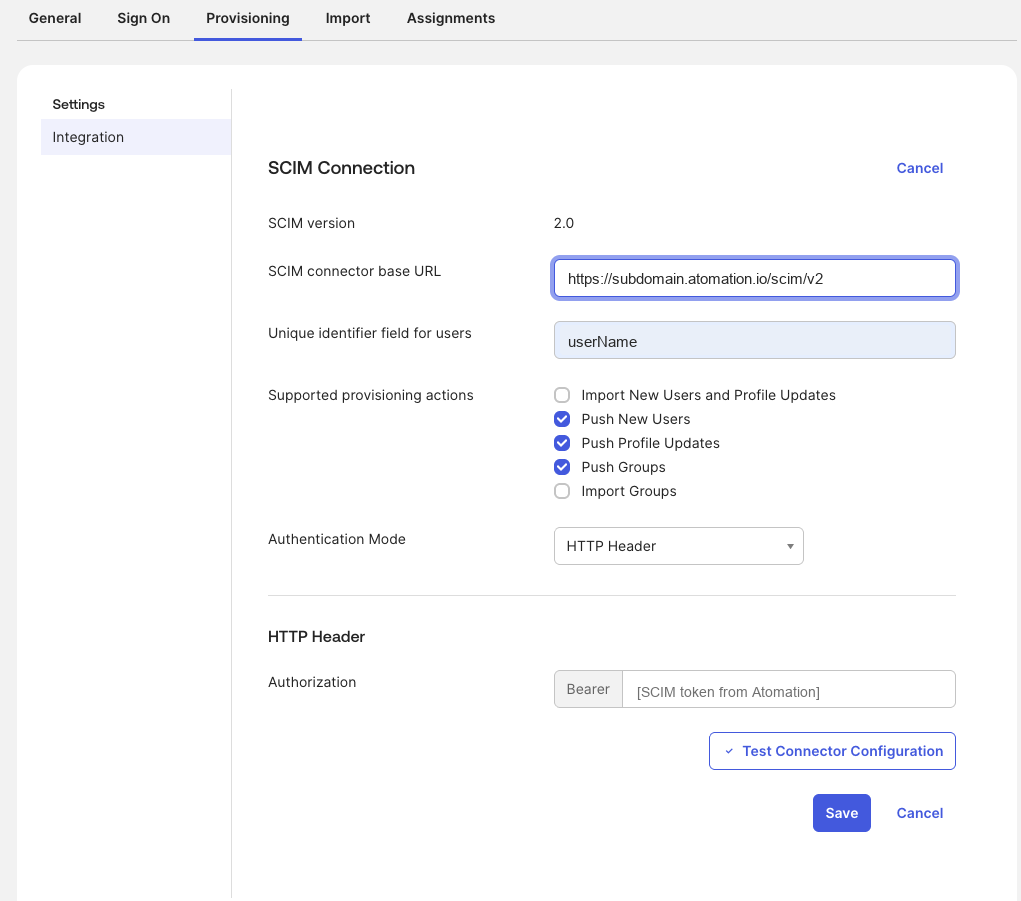
Use the exact tenant-specific SCIM Base URL shown under Administration → SSO / SAML. Generate the SCIM token under Connections, copy it once, and paste it into Okta as the bearer token.
| Okta Provisioning Field | Value To Use | Notes |
|---|---|---|
| SCIM version | 2.0 | Use the default Okta SCIM 2.0 connection. |
| SCIM connector base URL | https://subdomain.atomation.io/scim/v2 | Copy this from Atomation Administration → SSO / SAML. |
| Unique identifier field for users | userName | Atomation matches Okta SCIM users by userName. |
| Supported provisioning actions | Import New Users and Profile Updates, Push New Users, Push Profile Updates, Push Groups, Import Groups | Enable user/profile import only because Okta requires it to unlock Import Groups. Leave scheduled imports off and keep Okta as the source of truth. |
| Authentication Mode | HTTP Header | Use bearer-token authentication. |
| Authorization | Bearer + SCIM token | Paste the token generated in Atomation. It is shown once and remains valid until revoked. |

userName, HTTP Header authentication, and bearer token.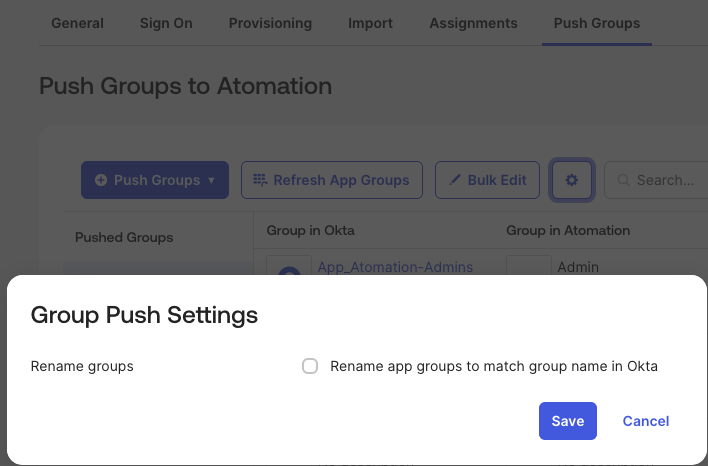
Copy The SCIM Base URL And Token From Atomation
In Atomation, go to Administration → SSO / SAML and copy the SCIM Base URL. Then open Connections, generate a SCIM token for the active org, and copy it immediately. Okta will use this token for ongoing provisioning requests until the token is revoked.
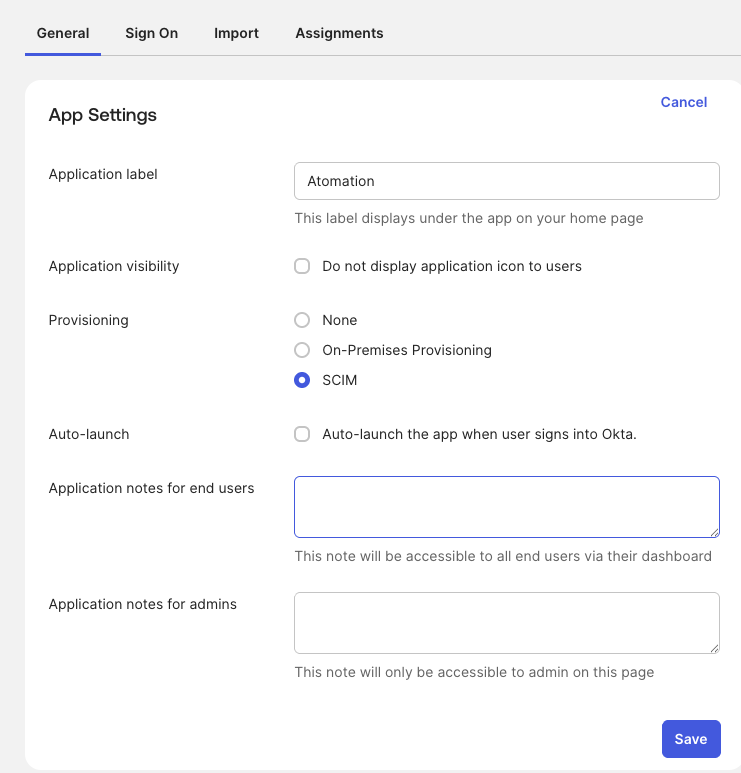
Enable SCIM On The Okta App
In Okta, open the Atomation app. On the General tab, click Edit, select SCIM under Provisioning, then click Save.
Enter The SCIM Integration Settings
Go to Provisioning → Integration. Set SCIM versionto 2.0, paste the Atomation SCIM connector base URL, set Unique identifier field for users to userName, selectPush New Users, Push Profile Updates, andPush Groups, then set Authentication Mode toHTTP Header. Enable Import Groups so Okta can discover Atomation role-groups for linking. If Okta requires Import New Users and Profile Updates before Import Groups can be enabled, enable it only to unlock group discovery. Leave scheduled imports off and do not make Atomation a profile source.
In the Authorization field, keep Bearer selected and paste the SCIM token generated in Atomation. ClickTest Connector Configuration, confirm the test passes, then clickSave.
Enable To App Lifecycle Actions
Under Provisioning → To App, enable Create Users,Update User Attributes, and Deactivate Users. Confirm mappings for username, first name, last name, and email.
userName- user emailname.givenName- first namename.familyName- last nameemail- user emailemailType- work
Link Groups To Atomation Roles
On the Push Groups tab, click Refresh App Groups so Okta can import Atomation role-groups such as Admin, Security Admin, Org Admin, Developer, Viewer, and User. If the refresh button is missing or the link list is empty, confirm Import Groups is enabled, confirm the SCIM integration test passed, then reload the page.
Open Group Push Settings, uncheck Rename app groups to match group name in Okta, and save. Then choose + Push Groups → Find groups by name, search for the Okta group that should grant a role, choose Link Group in the match result, and select the matching Atomation role-group. Use Link Group, not Create Group, when mapping to an existing Atomation role-group.
If Create Group is used, the app group name must exactly match one of the existing Atomation role-groups: Admin, Security Admin, Org Admin, Developer, Viewer, orUser. Atomation rejects any other new group name so Okta cannot create arbitrary role groups.
Review roles and permissions before granting Admin or Security Admin access.
Assign Users After SCIM Is Ready
Assign users only after SCIM is enabled, the connector test passes, lifecycle actions are enabled, and role groups are linked. If a user is assigned before Okta provisions them, their first sign-in can fail. To recover, remove the app assignment, wait for provisioning to complete, then add the assignment again.
Recommended approach: create one Okta group for app access, such as Atomation App Access, and assign the Atomation app to that group under Assignments. Use Okta Group Rules to add users to that app-assignment group based on the source or role groups you use for SCIM Group Push.
Keep app assignment groups and pushed role groups separate when your Okta model supports it. This avoids confusing app access with role membership.
Deactivating or unassigning a user in Okta deactivates them in Atomation and revokes access.
3. Support
- Email: [email protected]
- Include your Atomation tenant subdomain, Okta app label, the failed step, timestamp, and any Okta event or correlation ID.
- Okta SAML app integration reference
- Okta SCIM provisioning reference